Did you make this recipe? Please give it a star rating below!
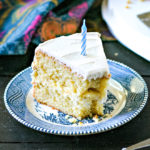
When it comes to gluten-free cake, my vanilla cake recipe is a WINNER. Made with simple ingredients, this cake truly tastes like it came from a bakery!
- 1.5 cups unsalted butter room temperature
- 1 Tablespoon unsalted butter, divided for greasing cake pans
- 2 cups organic sugar
- 8 large eggs room temperature
- 1 cup plain unsweetened hemp milk (or full fat cow's milk)
- 2 whole vanilla bean pods scraped and mixed with milk
- 12 ounces blanched almond flour 340 grams
- 4 ounces coconut flour 113 grams
- 4 teaspoons gluten free baking powder
- 1/2 teaspoon finely ground sea salt
- 2 9" round cake pans (2" high)
- Stand Mixer or Handheld Mixer
- Cake Tester
-
Begin by preheating oven to 350F. Drop 1/2 Tablespoon of butter into each pan and spread around until each cake pan is greased. Set aside.
-
In the bowl of a stand mixer (or a large mixer to be used with a hand mixer), cream together room temperature butter and sugar until smooth. I used speed 4 on my Kitchen Aid Stand Mixer.
-
While mixer is still on speed 4, add in eggs, one at a time.
TIP: Make sure to crack your eggs individually into a separate dish or bowl before adding to batter to avoid any shells.
-
Reduce mixer speed to 2 and slowly add in milk and vanilla bean seeds until well mixed.
-
In a separate mixing bowl, combine almond flour, coconut flour, baking powder and sea salt. Use a spatula or fork to mix around and get rid of any large lumps.
-
Add flour mixture into wet ingredients in small batches with mixer still running on lower speed (about 2 should work). Repeat until all flour is incorporated into batter and is thoroughly mixed and looks creamy.
-
Divide batter into cakes pans, use a spatula to spread around and even out top and bang the cake pans a couple times to allow any air bubbles to rise to the surface.
-
Place both cake pans into the oven on the center rack and bake for 40 minutes, alternating the cake pans at the halfway point (mostly because most ovens have hot spots and this helps with a more even bake time).
-
Use a cake tester or wood toothpick to gently test the center of each cake. If it comes out clean, place cake pan on cooling rack. If the tester comes out with cake batter on it, place back in the oven and check again in 3 to 4 minutes.
-
Allow cakes to cool for at least 30 to 45 minutes in the pans on a cooling rack. Grab a flat plate and place on top of cake. Gently flip over so that cake releases onto plate and place wax paper on bottom of cake. Place cooling rack under wax paper and gently flip back over so that cake is now cooling on a piece of wax paper on the cooling rack.
-
Allow cakes to cool completely - this may take a couple of hours - before frosting. Like I said in the notes, I like to make these the day before and allow to sit out and cool for most of the day. They are much easier to work! Right before frosting, use a sharp paring knife to gently scrape the top layer of each cake. This two layers will become the inside and it looks prettier if you don't see dark cake next to light frosting. If you are using a dark frosting like chocolate, skip this step!
-
I used my Vanilla Buttercream Frosting recipe and placed the cake on wax paper on a cake board I bought from a craft store for a couple of bucks. You could also use a cake stand or other cake platter. Frost as desired, serve and Enjoy!”
TIPS:
- The eggs must be size "Large". X-Large eggs will yield too moist of a cake.
- You must weigh the almond flour and coconut flour. Just a couple of Tablespoons up or down will dramatically change the finished texture of this cake.
- Make sure your eggs and butter are both at room temperature - leave them out for at least 45 min to 1 hour before starting this cake.
- As much as I know most of you don't want to use regular type sugar, that is really what this cake needs. I used Wholesome Sweeteners Organic Sugar, which is free of chemicals, bleach, herbicides, and pesticides. It's still pure sugar but this is a once-a-year birthday cake so I am fine with it. Alternative sugars like palm sugar and maple sugar (tried both) dramatically change both the texture and color and don't yield results that look or taste like a "traditional birthday cake" which is my goal! Maple syrup and honey add too much additional moisture.
- Preheat your oven at the very start and make sure you have a rack in the center position. You want the oven nice and hot!
- The brand of cake pan that you use can make all the difference. I really like USA Cake Pans and after trying this cake in multiple shapes have found that the 9" x 2" Round works the best.
- This cake is better the next day. That is a good thing because it means you can make it in advance!
SUBSTITUTIONS:
- If you don't want to use vanilla beans, you can absolutely substitute pure vanilla extract or vanilla bean paste. I highly recommend using the highest quality vanilla you can though since vanilla is the main flavor of this cake!
- Milk. I have tried this cake with both whole fat organic cow's milk and unsweetened, plain hemp milk and both have worked just fine. I did not try coconut milk but have a feeling that canned full-fat coconut milk would also work. I do NOT recommend rice milk, almond milk or any other low-fat type of milk as they are much thinner in texture and will change the final outcome.
- I have only tried this with Bob's Red Mill brand Blanched Almond Flour and Coconut Flour so I can't say 100% that other brands will work exactly the same but if you follow the other directions explicitly then hopefully you could successfully substitute another brand if you need to.
- My son specifically requested Vanilla Bean cake and Vanilla Bean Icing so I used this Icing recipe (delish!). However, I actually think chocolate icing would go better and really complement the vanilla flavor of the cake!
Did you make this recipe? Tag @EverydayMaven on Instagram with the hashtag #EveryDayMaven and please give a star rating below.